How to Enable MFA for your IAM User on AWS
Dear Reader, In one of my previous post I explained how to create an IAM user step by step. As a security best practice, AWS highly recommends to setup MFA for your IAM user to protect your user from being compromised. Setting MFA helps you protect access to your AWS resources.
In simple terms MFA means multi factor authentication –
MFA = Something you know(username/password) + Something you own(MFA device)
Once you setup MFA, AWS asks you for a one time passcode from your owned security device. As a result, it provides additional security in contrast to username/password combination(Which can be hacked).
Considering it’s importance, I decided to come up with a beginner friendly post on how to enable MFA for your IAM user on AWS. In this post, I will help you setup MFA for your IAM user using one of the supported virtual MFA device(Mobile App).
Prerequisite:
- An AWS Account
- Permission to manage your own MFA
So let’s get started…
Step 1: Download an AWS compatible Authenticator App
As of now, there are three different options for MFA devices on AWS including hardware ones(We will see in upcoming section). Since I wanted to use my phone, I am going ahead with a mobile app also referred as virtual MFA device.
At the time of writing this, AWS supports below mentioned virtual devices. However, feel free to check the updated list of supported devices on official AWS page.

I am going ahead with Google Authenticator app. You can install your favorite one.
Here are the links for Google Authenticator for Android and ios
- Android: Google Authenticator
- iOS: Google Authenticator
You can go to your respective App store and download Goggle Authenticator
Step 2: Login to AWS Management Console and Navigate to IAM
App is being downloaded, meanwhile you can login to AWS Management Console and open IAM service.
You can either go to Services -> Security, Identity, & Compliance -> IAM
or
Search IAM in the console search bar as shown below and click on IAM.

Step 3: Click on Your IAM User name for which you want to setup MFA
Once you click on IAM, you will be redirected to IAM dashboard.
Click Users on the left navigation panel and you will see the list of users in your account.
Click on the your username to enable MFA for the same.
Once you click on your user, you will see below screen.

Click on Security credentials tab as shown in screenshot

Click on Manage in Assigned MFA device row.
There are three options as of now for you to choose from-

Select Virtual MFA device and click Continue
You will see a dialog window with instruction to setup MFA and a Show QR code button.

As you can see the steps in the dialog, we need to scan the QR code with our authenticator app. Once authenticator is setup, it will start generating 6 digit code in the interval of 30 seconds. We need to provide two consecuting code here in console to finish MFA setup. We will do this in next few section.
Click on Show QR in the above dialog so that you can scan it using your app.
Step 4: Open Authenticator App installed in Step 1 and Scan QR
Open Google Authenticator App on your phone and Click Get Started or + icon

Click Scan a QR code

Once you click on Scan a QR code, your camera opens up. Scan the QR code from IAM console shown in previous step.
App detects your account. Click on Add ACCOUNT in Autheticator app to add your AWS account in your app. Once account added, you will start seeing a 6 digit code. Please note that we are not yet done with MFA setup. We need to provide two consecutive code in console
Step 5 : Type 2 Consecutive MFA codes from your Authenticator App

Enter your first code, wait for sometime for second code to appear then enter second code and click Assign MFA
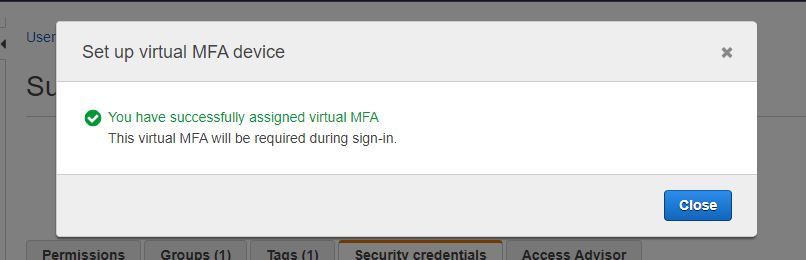
Congratulations !!! You have successfully enabled MFA on your AWS account for your IAM user. Let’s verify the same.
Step 6: Verify MFA Setup
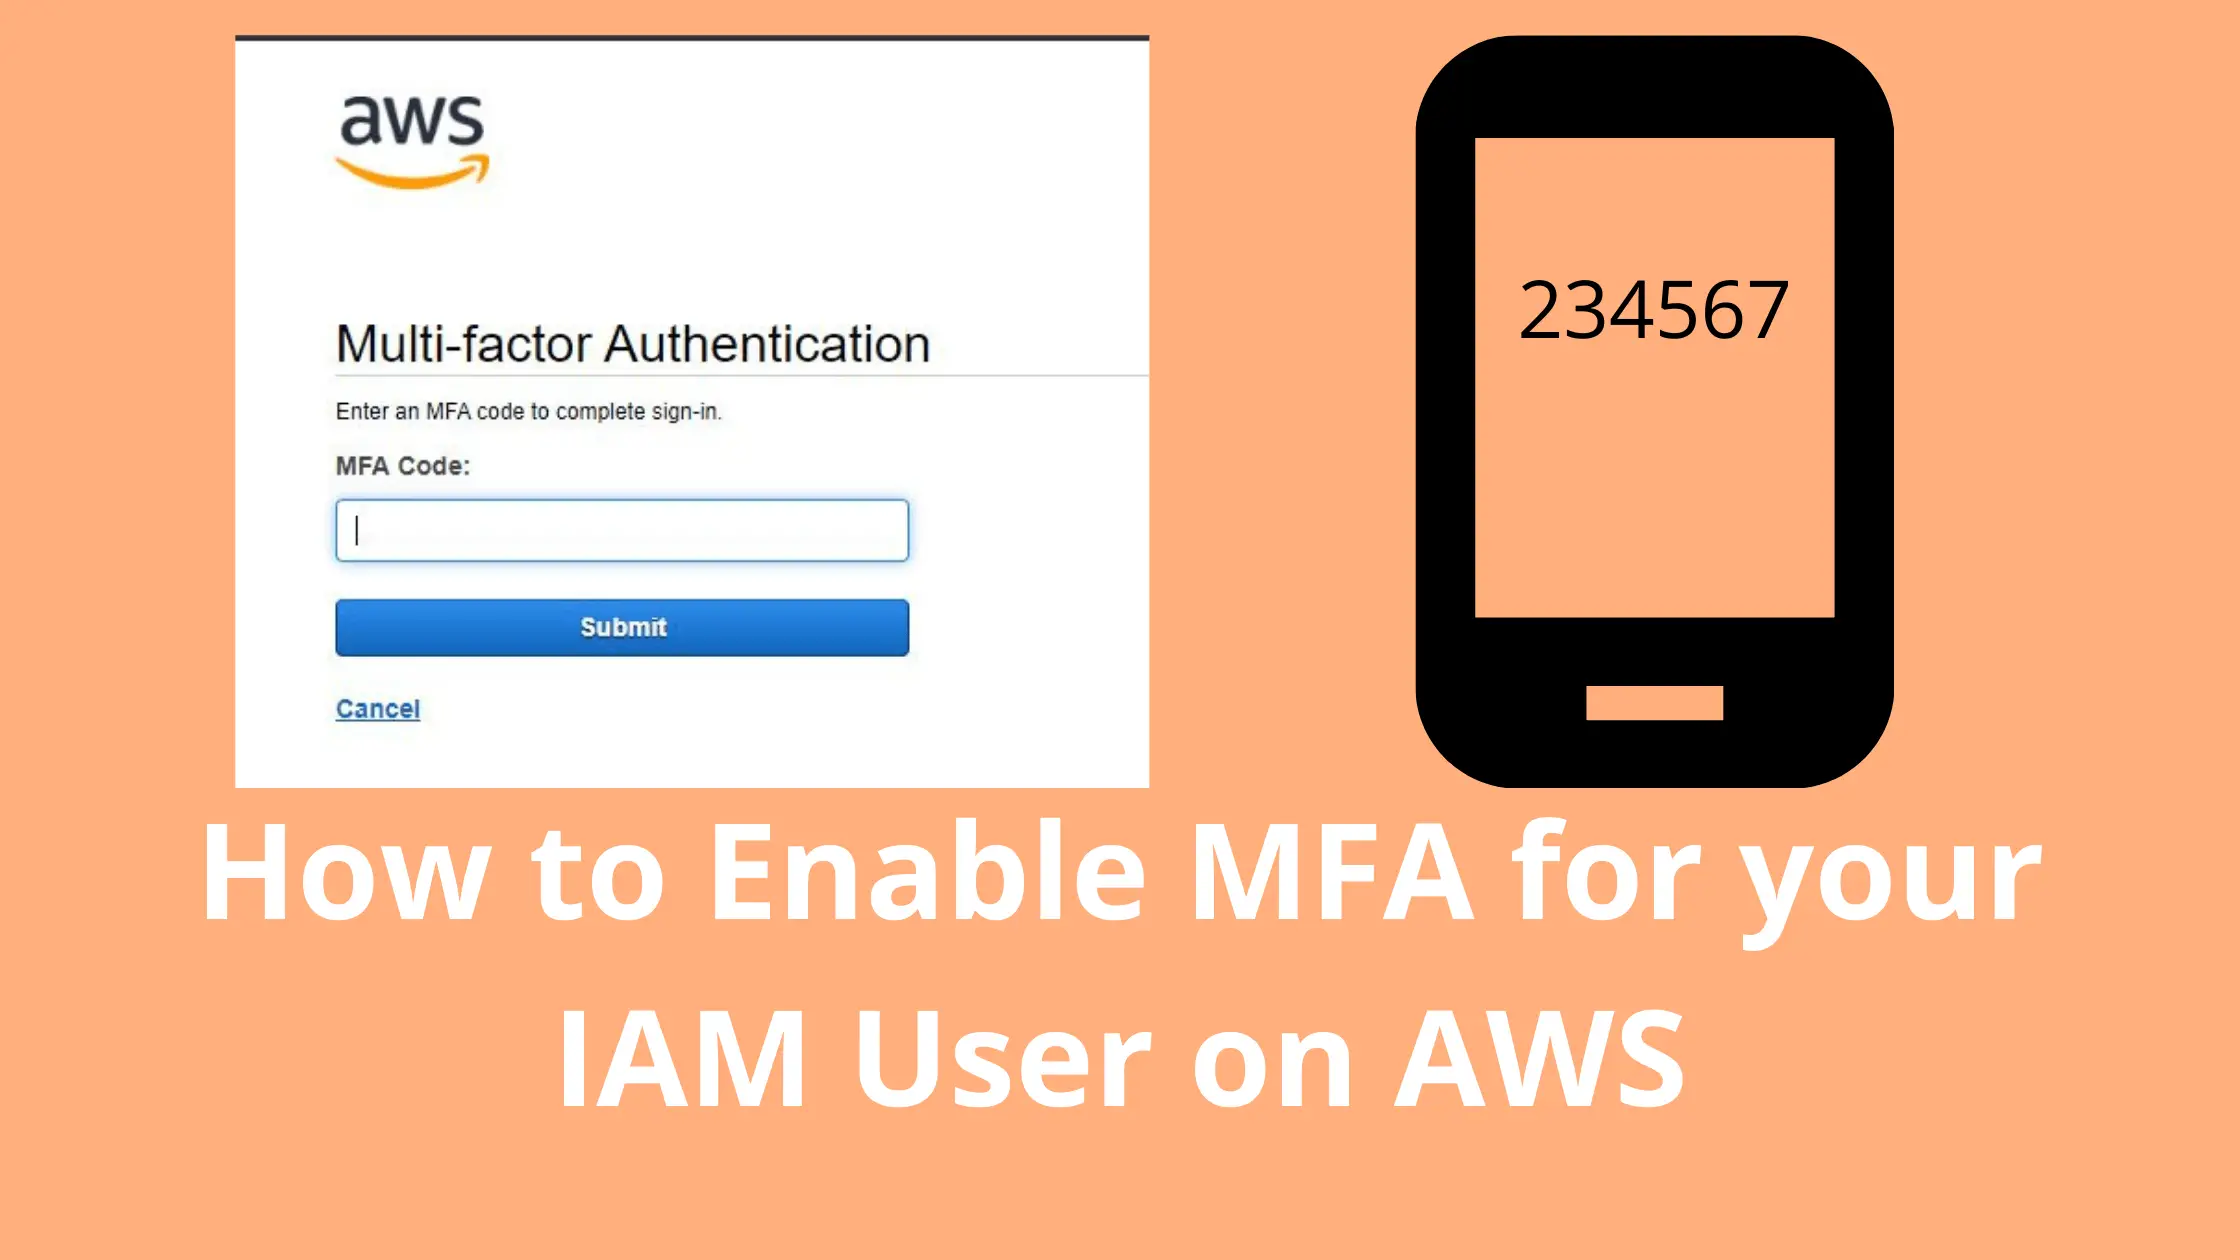
Log out of your account and try to login again.
This time, you will be prompted for an MFA code after you enter your username/password and click Sign In

Enter the 6 digit code from your authenticator app here and click Submit.
There you go !!!!
You should be able to see your AWS console dashboard after a successful login.
Conclusion
In this tutorial, You learnt “How to Enable MFA for your IAM User on AWS”. We discussed that as part of security best practice AWS recommends to enable MFA for your root user as well as IAM user.
We used AWS compatible virtual MFA device(Google Authenticator) to setup MFA for our IAM user. In addition to that, we also learnt that after enabling MFA we will be required to enter an MFA code in order to login to AWS console. As a result we enhanced our security to next level against any compromises.
If you have any question, please feel free to drop in comment section.
Enjoyed the content?
Subscribe to our newsletter below to get awesome AWS learning materials delivered straight to your inbox.
I hope you enjoyed this tutorial. If you have a question, feel free to drop in comment. I will be more then happy to answer your query.
Meanwhile you can also –
Suggested Read:
- Difference between AWS Root user and IAM User
- Attach an IAM Role to an EC2 Instance using CloudFormation
- Create an S3 Bucket using CloudFormation
- Understand IAM PassRole to Secure your AWS Infrastructure
- AWS S3 Encryption: Ways to Secure Your Data in S3
- How to Create S3 Bucket using CloudFomation
- AWS S3 Storage Classes: Everything You Need to Know
- AWS SQS Standard vs FIFO Queue
- How to Create S3 Bucket Policy using CloudFomation
- Provision ACM certificate using CloudFormation
- Create SSM Parameter using CloudFormation