How to Deploy Spring Boot App to AWS Elastic Beanstalk
Dear Reader, I hope you are doing well today. In one of my previous posts, I share with you how to deploy Spring Boot application to an AWS EC2 instance.
In this tutorial, I will help you deploy Spring Boot application to AWS Elastic Beanstalk using the AWS console.
Additionally, I will also show you, how you can customize Spring Boot configurations using environment variables(In case you have a DB config or you want to change port).
Don’t want to miss any posts from us? join us on our Facebook group, and follow us on Facebook, Twitter, LinkedIn, and Instagram. You can also subscribe to our newsletter below to not miss any updates from us.
A little bit of Background
Spring Boot is a java based framework. It allows you to create production-grade, stand-alone spring-based applications that you can simply run. As a result, It is a very popular Java framework among developers for API development.
With the ever-increasing demand for cloud computing, I have seen many people asking this question in various online forums. That’s why I decided to come up with an explicit post on how to deploy the Spring Boot app to AWS Elastic Beanstalk.
Alright !!! Let’s move ahead…
Elastic Beanstalk is a fairly easy-to-use orchestration service by AWS for deploying and scaling web applications and web services. At the time of writing this tutorial, it supports languages such as Java, .NET, PHP, Node.js, Python, Ruby and Go.
Moreover, Elastic Beanstalk lets you deploy your applications on servers such as Apache, Nginx, Passenger, Tomcat, IIS and Docker.
How to Deploy Spring Boot App to AWS Elastic Beanstalk?
To be honest, deploying an application on Elastic Beanstalk is very easy. All you need is to upload your code and Elastic Beanstalk does all the heavy lifting for you like-
- Deployment
- Capacity provisioning
- Load balancing
- Auto-scaling
- Application health monitoring etc.
In this blog post, I’ll leverage Elastic Beanstalk’s support for Java 8. I will not be using Java with Tomcat because Spring Boot bundles an embedded Tomcat server suitable for production workloads.
So let’s get started
Steps to Deploy Spring Boot App to AWS Elastic Beanstalk
- Create a Spring Boot project using Spring Initializr
- Import the project into your favourite IDE
- Add a RestController to be able to test
- Test the application locally
- Prepare the final jar file
- Login to AWS Management Console and open Elastic Beanstalk
- Create an Application
- Change the port of the application
- Test Spring Boot Application Deployed on Elastic Beanstalk
- Update your Spring Boot app
Step 1: Create a Spring Boot project using Spring Initializr
If you already have a working Spring Boot application, you can jump straight to Step 5 to start with the deployment. However, If you don’t have one ready, please follow along with me to create a new spring boot application.
let’s go to sprint initilizer page and quickly bootstrap a simple spring boot web application.
Open https://start.spring.io/ and fill up details such as Group, Artifact, Name and dependency.

Note: Please note that I have added a single dependency Spring Web as you can see in the above screenshot.
After filling up the details and selecting web dependency, click on Generate
This will download the zipped project into your local system.
Step 2: Import the project into your favourite IDE
Unzip the downloaded project and import the project into your IDE. I will be importing to Eclipse for this tutorial.
Click on File -> Import -> Maven -> Existing Maven Project
Hit Next
Click on Browse and navigate to your unzipped project folder and select that. Selecting that should show the pom.xml file as shown in the below screenshot.

Click on Finish to the project into the IDE.
Step 3: Add a RestController to be able to test
Now, we have the project imported into the IDE. Let’s add a Rest Controller to our spring boot project so that we can test it.
Click on your project and create a controller class with the endpoint of /. We will use minimal code like the below snippet.
package com.cloudkatha.demo.controller;

import org.springframework.web.bind.annotation.GetMapping;
import org.springframework.web.bind.annotation.RestController;

@RestController
public class TestController {

@GetMapping("/")
public String health() {
  return "Hello & Welcome to CloudKatha !!!";
}
}
Important Notes:
Elastic BeanStalk’s load balancer uses path “/” by default for health checks. If you don’t have that path defined in your controller, your application will keep failing health checks and will show Severe status in the dashboard. You can either have “/” endpoint in your rest controller or edit the load balancer setting later to use a different path instead
Step 4: Test the application locally
First of all, let’s build the project using-
mvn clean installOnce the build is successful, let’s run the project locally.
You can right-click on the class annotated with @SpringBootApplication and Run as Java Application.

The application is running fine locally and I can access it using localhost:8080
Step 5: Prepare the final jar file
Our application is working perfectly in the local environment. Let’s prepare the final jar file and keep it handy in a folder. We will need the jar file during the deployment.
Run maven build to package the application as a fat jar.
mvn clean installOnce your build is successful, you will find the jar file in target folder. Copy the jar file and keep it in your system at a convenient location.
Step 6: Log in to AWS Management Console and open Elastic Beanstalk
To deploy the jar file we just created in the previous step into AWS Elastic Beanstalk, the very first step is to log in to AWS Management Console and open the Elastic Beanstalk service.
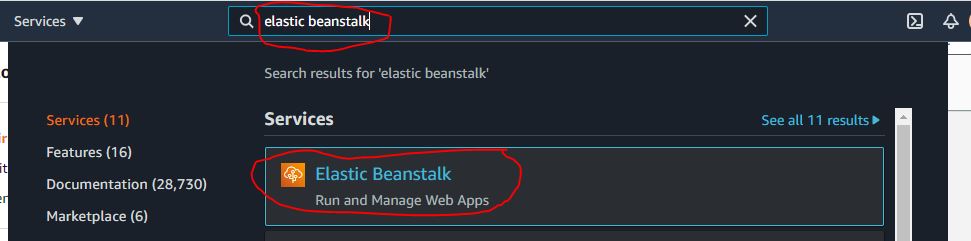
You can either go to Services -> Compute -> Elastic Beanstalk
or
Type elastic beanstalk in the search bar. Once you see the Elastic Beanstalk option, click on that.
Step 7: Create an Application
An application is a top-level container in Elastic Beanstalk that contains one or more application environments (for example dev, qa and prod etc).
So, let’s create an application.
Click on Create Application

Provide an Application name. You can also provide a tag if you want but I will skip that as of now to keep it simple.

Scroll down and provide the below information.
Platform : Java
Platform branch: Corretto 8
Platform version: Best to choose recommended one
This is what it looks likes after selecting these options for our spring-boot application.

Click on Upload your code option

Click on Choose file and upload the jar file we created in Step 5
Once the jar is uploaded successfully, Click on Create application as shown in the below screenshot.

As soon as you click Create application, Elastic Beanstalk starts setting up your application environment. You get to see the log of what’s happening behind the scene on the dashboard like below.

It will take a few minutes for Elastic Beanstalk to provision resources to set up the complete environment. Meanwhile, you can try to understand log on what’s really happening(just for fun and learning of course). Once setup is done, you will see the below screen.
Important Note:
Elastic Beanstalk needs the following two service roles for the orchestration.
- aws-elasticbeanstalk-ec2-role with policy AWSElasticBeanstalkWebTier
- aws-elasticbeanstalk-service-role with policy AWSElasticBeanstalkEnhancedHealth
Usually, they get created automatically when creating your first Elastic Beanstalk environment with the Management Console or Elastic Beanstalk CLI. But sometimes you may face issues. I am just letting you know that if you face a default role creation issue, just go ahead and create these two role with mentioned policy and you should be good to go.

Resource provisioning is completed. But, application health is Severe at the moment. You can click on the Causes, you will see 5XX errors.
You might think why this?
Well, Elastic Beanstalk by default provides an EC2 instance that runs Nginx as a reverse proxy and listens to port 80. Nginx by default forwards the request to the application running on internal port 5000.
Therefore, we need to make sure that our Spring Boot application runs on port 5000.
Step 8: Change the port of the application
There are quite a few ways of doing this like-
- Changer server.port to 5000 in application.properties file
- Use Elastic Beanstalk Environment variable to provide SERVER_PORT
Going with the first option will require changing the application code, building and redeploying. So let’s go ahead with 2nd option. Let’s change the environment variable to make our spring boot application listen on 5000.
On the left-hand side project menu, Click on Configuration

There are various categories displayed here. Environment variables belong to the Software category as you can see below. So, let’s click the edit Software category.

Click Edit and scroll down to the Environment Properties section
Add a property with the name SERVER_PORT and Value 5000.

Click Apply
Wait for some time as you see your environment is getting updated. Behind the scene, the application gets restarted and picks up the latest environment variables. Once done, you will see the application health updated as green. Yahooo 🙂
Let’s go ahead and test our application.
Step 9: Test Spring Boot Application Deployed on Elastic Beanstalk

Click on the application endpoint(Underlined with red on the above screenshot)

Congratulations !!!
You have successfully deployed your Spring Boot application to AWS Elastic Beanstalk.
Step 10: Update your Spring Boot app
Now, this was a hello world kind of example. You may want to go ahead and make changes in your app and redeploy your changes.
Right?
You are thinking about how to do that?
Isn’t it?
Don’t worry, It’s very simple.
Go back to IDE and make some changes. Prepare the jar and keep handy.
Click on Upload and Deploy and upload your jar file. Wait for some time for the application to restart with the new jar to be updated. Once updated successfully, hit the endpoint to validate your changes.
Conclusion
In this tutorial on How to Deploy Spring Boot App to AWS Elastic Beanstalk we-
- Created and tested a Spring Boot application from scratch
- Created an Elastic Beanstalk Application using our jar file
- Updated the environment variable for our app to listen on port 5000
- Tested our deployed Spring Boot application.
I hope you enjoyed the tutorial. Do let me know in the comments if you were able to deploy Spring Boot App to AWS Elastic Beanstalk.
Enjoyed the content?
Subscribe to our newsletter below to get awesome AWS learning materials delivered straight to your inbox.
Meanwhile, you can also –
Suggested Read:
- How to Deploy a Spring Boot Application on EC2 Instance
- Understand IAM PassRole to Secure your AWS Infrastructure
- How to Configure AWS SQS DLQ using CloudFormation
- AWS S3 Encryption: Ways to Secure your Data in S3
- How to Setup S3 Lifecycle Configuration using CloudFormation
- AWS S3 Storage Classes: Everything You Need to Know
- Create an SQS Queue using CloudFormation
- AWS SQS Standard vs FIFO Queue
- How to Create S3 Bucket Policy using CloudFomation
- Provision ACM certificate using CloudFormation
- Create an EC2 Instance in an existing VPC using CloudFormation
- Attach an IAM Role to an EC2 Instance using CloudFormation
- Create SSM Parameter using CloudFormation
8 thoughts on “How to Deploy Spring Boot App to AWS Elastic Beanstalk”
Its really very good explanation about the deployment. Thank you so much
Thank you Krishna 🙂
Most appreciated! I was able to get my simple app online and running (updated app for port 5000).
Thank you John
Very helpful, thanks for the post. What if your Java applocation had a MySql integrated? do you have any posts on that? that would be useful
I don’t have a post handy on that. But I guess I can write a new one on that soon 🙂
A very informative article that helped me deploy a java application on aws. Especially the solution to the severe health status error was very helpful. Thank you
Glad it was helpful 🙂