How to Attach an IAM Role to EC2 Instance using Terraform
Dear Reader, a few days ago I shared with you How to Attach an IAM role to AWS EC2 Instance using CloudFormation.
In this post, you will learn to Attach an IAM Role to EC2 Instance using Terraform
We’ll create an IAM role and attach it to an EC2 instance. Additionally, I will show you how to attach an existing IAM role to an EC2 instance using Terraform.
So, Let’s get started 🙂
Don’t want to miss any posts from us? join us on our Facebook group, and follow us on Facebook, Twitter, LinkedIn, and Instagram. You can also subscribe to our newsletter below to not miss any updates from us.
Prerequisite
- An active AWS account: See How to Setup AWS Free Tier Account in Right Way
- Terraform Installed in Your System: See How to Install Terraform in Your System
- Basic Terraform Knowledge
Assumption: We assume that you know how to create a resource on AWS using Terraform. If you are a beginner and need help with that, consider reading our previous post: Getting Started With Terraform on AWS In Right Way
A Bit of Background
Imagine, you have deployed an application on Amazon EC2. Your applications need to access another service for example an S3 bucket.
But, do you know that, by default an EC2 instance can not access S3 or any other AWS service?
This is what you get when you try to do so –
Unable to locate credentials. You can configure credentials by running “aws configure”.
You have two options-
- Configure credentials using your access key/secret key handy.
- Create an IAM role with permission and attach it to EC2
In the first option, you’ll store your credential on your EC2 machine. Which is not safe at all.
What to do then?
Hmm, you should rather use an IAM role to give permission to your instance
How Exactly Do You Attach a Role to an EC2 Instance?
By now we know that to permit an EC2 instance to access AWS service securely, we need to attach an IAM role to the instance. However, do you know that you can’t directly attach an IAM role to EC2 Instance?
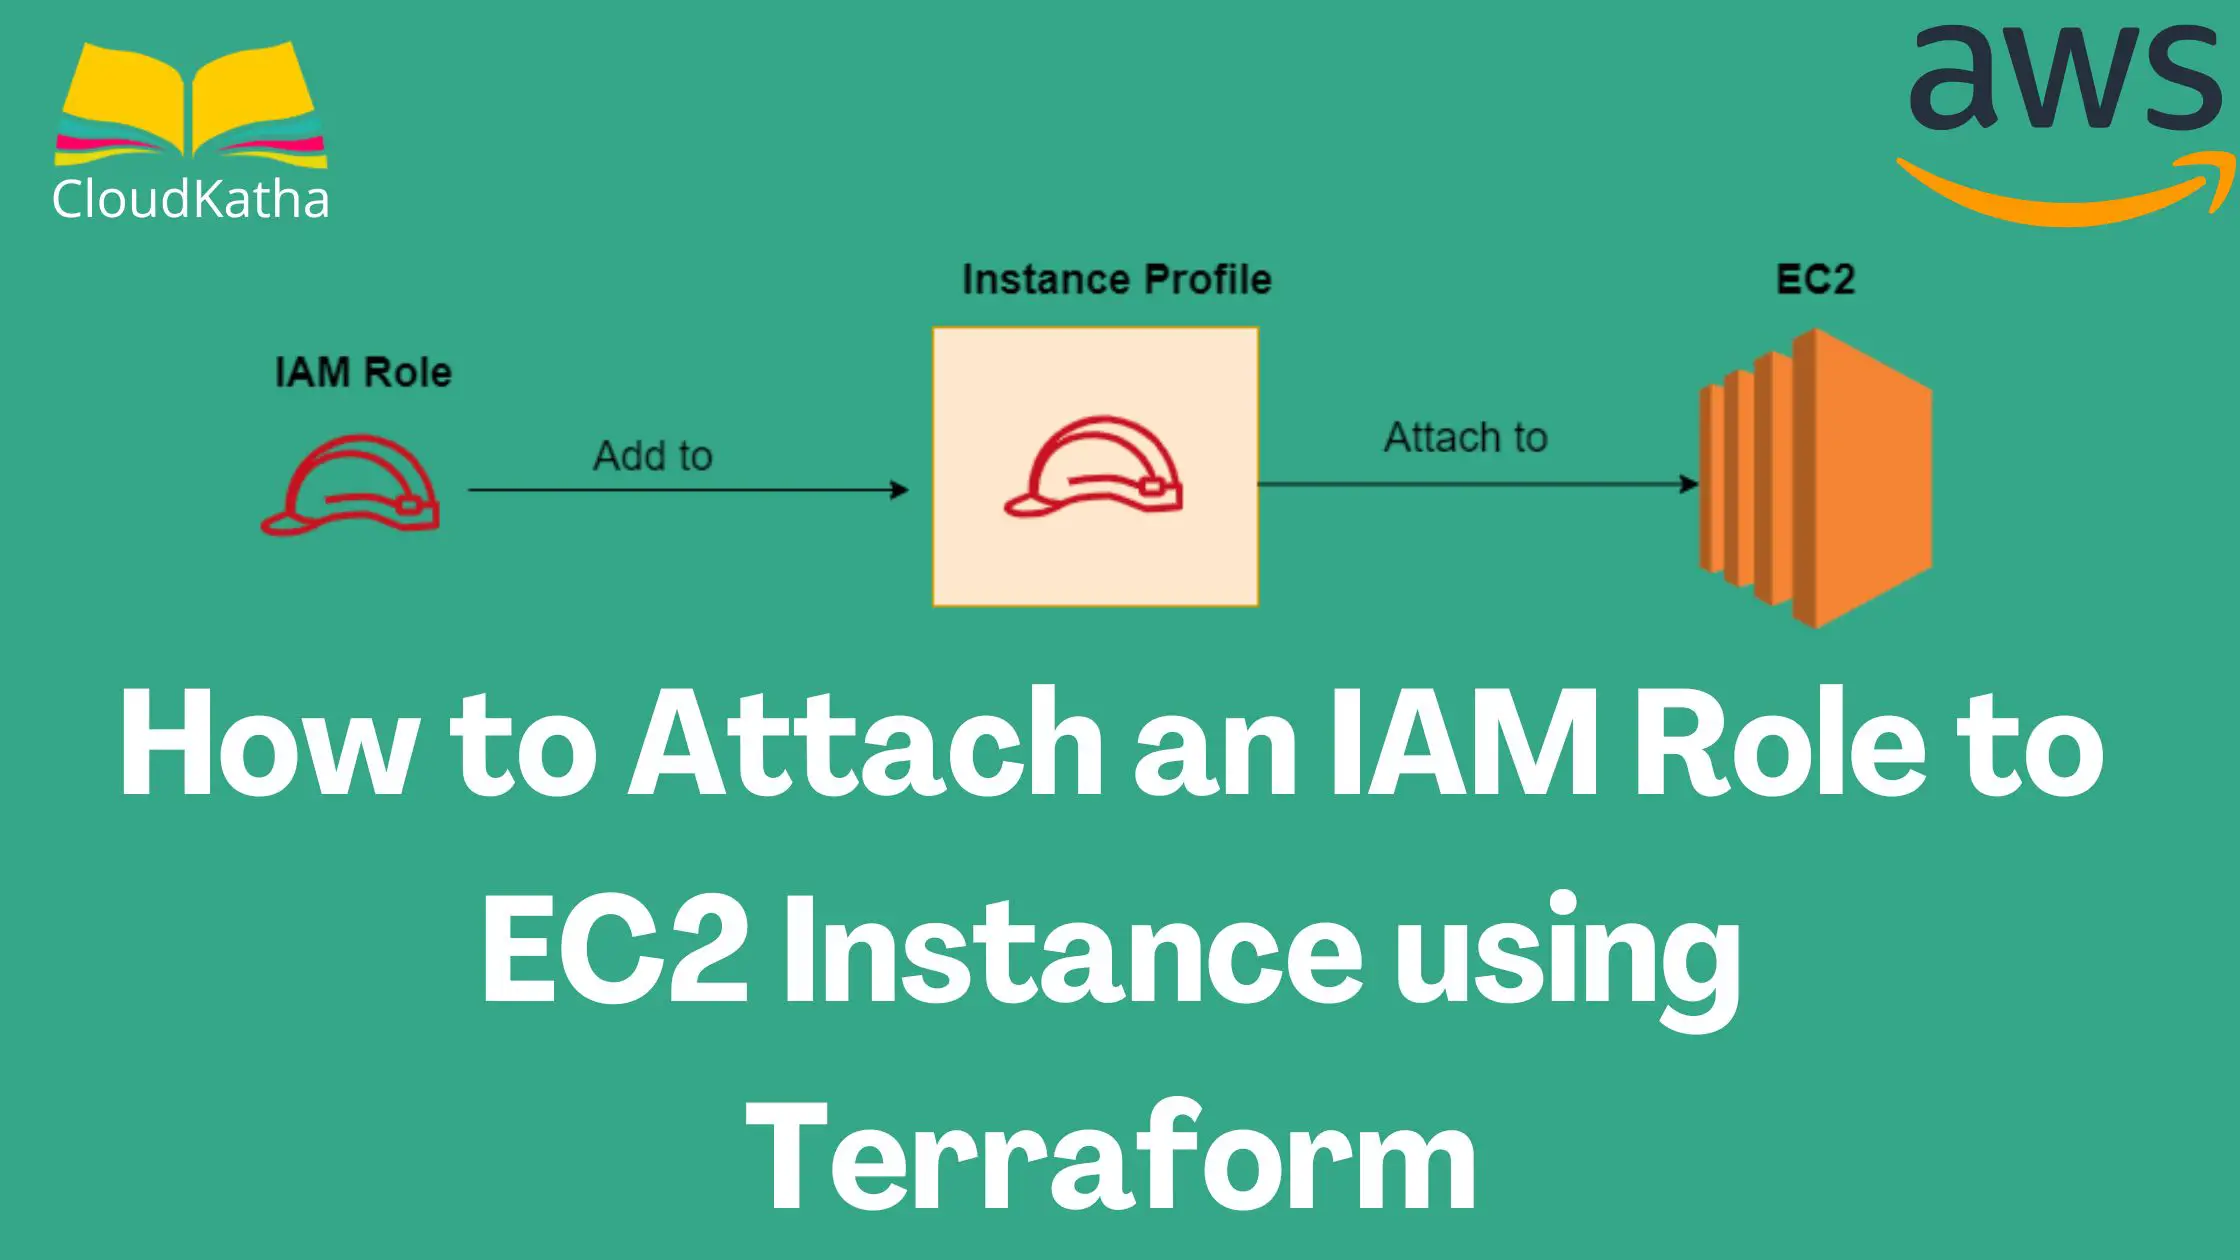
You do it via Instance Profile.
Instance profile is nothing but the container for an IAM role.
- You can use an instance profile to pass an IAM role to an EC2 instance.
- An instance profile can only contain one IAM role. However, please note that a role can belong to multiple instance profiles.
when you create an IAM Role for EC2 using the IAM Console, it creates both an EC2 instance profile as well as an IAM role with the same name. So, you don’t exactly see it. But it happens behind the scenes.
On a high level, if we see, you create an instant profile using the role and then you attach the instance profile to an instance.

Create a Role/Take an existing Role –> Put it into an Instance Profile –> Attach instance Profile to EC2 instance.
Let’s understand how it is done using Terraform.
Steps to Attach an IAM Role to EC2 Instance using Terraform
- Create Terraform Configuration File With Boilerplate Code
- Create an IAM policy with the required permission
- Create an IAM role for EC2 Instance
- Attach the Policy to the created IAM role
- Create an instance profile using the role
- Attach the Instance Profile to EC2
- Validate role attachment
Step 1: Create Terraform Configuration File With Boilerplate Code
When we deploy a resource on AWS using Terraform, we create a configuration file and specify our resource.
First of all, we’ll add the boilerplate code to add the AWS provider and connection details.
It looks like below-
terraform {
  required_providers {
    aws = {
      source  = "hashicorp/aws"
      version = "~> 3.27"
    }
  }
}

provider "aws" {
  profile = "default"
  region  = "ap-south-1"
}
This is a necessary step and without this code, you won’t be able to work with AWS.
Step 2: Create an IAM policy with the required permission
Now starts the parts for attaching an IAM role. A role on its own is nothing. It’s the policy that specifies what a role can do. We start by creating an IAM policy that will be used in our role later.
#Create an IAM Policy
resource "aws_iam_policy" "demo-s3-policy" {
  name        = "S3-Bucket-Access-Policy"
  description = "Provides permission to access S3"

  policy = jsonencode({
    Version = "2012-10-17"
    Statement = [
      {
        Action = [
          "s3:GetObject",
        ]
        Effect   = "Allow"
        Resource = [

 "arn:aws:s3:::demo-talk-with-anu/*" ]
      },
    ]
  })
}
As you can see above, the policy allows everyone to have s3:GetObject or read access on all objects in bucket demo-talk-with-anu
Step 3: Create an IAM role for EC2 Instance
Create an IAM role for EC2 instance that can be assumed by your instance while it tries to access AWS S3.
#Create an IAM Role
resource "aws_iam_role" "demo-role" {
  name = "ec2_role"

  assume_role_policy = jsonencode({
    Version = "2012-10-17"
    Statement = [
      {
        Action = "sts:AssumeRole"
        Effect = "Allow"
        Sid    = "RoleForEC2"
        Principal = {
          Service = "ec2.amazonaws.com"
        }
      },
    ]
  })
}
As you notice in the above resource, assume_role_policy parameter is being set. It specifies who can assume this role. We have specified that the EC2 service can assume this role by mentioning ec2.amazonaws.com principal.
Step 4: Attach the Policy to the created IAM role
At the moment, we have defined an IAM policy and an IAM role that will use the policy and will be assumed by our Instance.
But have we defined any connection between policy and role?
Of course not.
Let’s do that.
resource "aws_iam_policy_attachment" "demo-attach" {
  name       = "demo-attachment"
  roles      = [aws_iam_role.demo-role.name]
  policy_arn = aws_iam_policy.demo-s3-policy.arn
}
The aws_iam_policy_attachment resource attaches the policy we created earlier to our EC2 role.
Notice the parameter roles and policy_arn. We have used aws_iam_policy.demo-s3-policy.arn to specify the policy that we want to attach to the role specified in the roles parameter.
Step 5: Create an instance profile using the role
We have made good progress and we now have a role ready to use with our EC2 instance.
Just to remind you again, we can’t attach an IAM role to the Ec2 instance directly so we’ll create an instance profile containing this role.
resource "aws_iam_instance_profile" "demo-profile" {
  name = "demo_profile"
  role = aws_iam_role.demo-role.name
}
Here the important thing to notice is the role. You need to specify the role name here and not the ARN. This is the mistake that many people do so I am letting to know.
Additionally, If you want to attach an existing role to your EC2 instance, mention the existing role in the role parameter of the above aws_iam_instance_profile resource.
That way, when you attach the instance profile to our instance, our instance will have the desired role.
Step 6: Attach the Instance Profile to EC2
We have the instance profile ready with our desired role so let’s attach it to our Ec2 instance.
For this, we’ll create an EC2 instance and then will attach it.
#Create EC2 instance and Attach Instance Profile
resource "aws_instance" "demo-instance" {
  ami = var.ami-mumbai
  instance_type = "t2.micro"
  key_name = var.key-name
  iam_instance_profile = aws_iam_instance_profile.demo-profile.name
}
Notice the iam_instance_profile parameter. It specifies the name of the instance profile that we have created using aws_iam_instance_profile.demo-profile.name.
PS: The var.key-name and var.ami-mumbai that you see, we will add these parameters in our config as well and here you can see the complete configuration file.
#Provider Declaration
terraform {
  required_providers {
    aws = {
      source  = "hashicorp/aws"
      version = "~> 3.27"
    }
  }
}

#Authenticate to AWS and region in which resource will be created
provider "aws" {
  profile = "default"
  region  = "ap-south-1"
}


#Variable Declarations
variable "ami-mumbai" {
  type = string
  default = "ami-01216e7612243e0ef" # ap-south-1
}

variable "key-name" {
  type = string
  default = "MyDemoEC2eyPair"
}

#Create an IAM Policy
resource "aws_iam_policy" "demo-s3-policy" {
  name        = "S3-Bucket-Access-Policy"
  description = "Provides permission to access S3"

  policy = jsonencode({
    Version = "2012-10-17"
    Statement = [
      {
        Action = [
          "s3:*",
        ]
        Effect   = "Allow"
        Resource = [
		  "arn:aws:s3:::demo-talk-with-anu",
		  "arn:aws:s3:::demo-talk-with-anu/*"]
      },
    ]
  })
}

#Create an IAM Role
resource "aws_iam_role" "demo-role" {
  name = "ec2_role"

  assume_role_policy = jsonencode({
    Version = "2012-10-17"
    Statement = [
      {
        Action = "sts:AssumeRole"
        Effect = "Allow"
        Sid    = "RoleForEC2"
        Principal = {
          Service = "ec2.amazonaws.com"
        }
      },
    ]
  })
}

resource "aws_iam_policy_attachment" "demo-attach" {
  name       = "demo-attachment"
  roles      = [aws_iam_role.demo-role.name]
  policy_arn = aws_iam_policy.demo-s3-policy.arn
}

resource "aws_iam_instance_profile" "demo-profile" {
  name = "test_profile"
  role = aws_iam_role.demo-role.name
}


#Create EC2 instance and Attach Instance Profile
resource "aws_instance" "demo-instance" {
	ami = var.ami-mumbai
	instance_type = "t2.micro"
	key_name = var.key-name
    iam_instance_profile = aws_iam_instance_profile.demo-profile.name
}

output "public_ip" {
  value = aws_instance.demo-instance.public_ip
}
This completes our configuration. Time to deploy this terraform configuration.
Open a terminal in the folder where you have your Terraform configuration file.
Initialize the directory with AWS necessary plugins by running terraform init

Run terraform apply
Review the changes and enter yes when the prompt asks you.

Our resources are successfully created, time to validate it.
Step 7: Validate role attachment
Login to the AWS Management Console and open the EC2 dashboard.
Select your created instance and click on it to see the instance details screen.

Notice the IAM Role is shown in the above section.
Congratulations !!! you have successfully attached an IAM role to the EC2 instance using Terraform.
Clean Up
Finally, if you are doing this exercise for learning purposes, you can clean up by destroying the created resource.
terraform destroyType yes, and hit enter
Once you hit enter, your resources get destroyed. You can sleep peacefully without worrying about the cost now.
PS: By the way, you can do one more thing, You can set a cost budget on your AWS account to protect yourself against unwanted costs. Here is how you can do that: How to Create a Cost Budget in AWS to Keep Your AWS Bills in Check
Conclusion:
In this post, we learned how to attach an IAM role to an EC2 instance using Terraform
Let’s summarize what we did in this post.
- IAM role can’t be directly attached to an EC2 instance. Therefore, the first instance profile needs to be created with the role and then the instance profile is attached to an instance.
- When using the IAM console to create an IAM role for EC2, an instance profile with the same name is created.
- Using CLI, SDKs, Terraform and CloudFormation, needs roles and instance profiles to be created separately.
- After an instance profile is created with a role, It can be attached to an instance.
- An instance profile can only have one role at a time. However, one role can belong to multiple instance profiles.
Well, that was my take on “Attach an IAM Role to EC2 Instance using Terraform“. Please feel free to share your feedback.
Enjoyed the content?
Subscribe to our newsletter below to get awesome AWS learning materials delivered straight to your inbox.
If you liked reading my post, you can motivate me by-
- Adding a comment below on what you liked and what can be improved.
- Follow us on Facebook, Twitter, LinkedIn, Instagram
- Share this post with your friends and colleagues.
Suggested Read:
One thought on “How to Attach an IAM Role to EC2 Instance using Terraform”