How to Assign Elastic IP address to your EC2 Instance in AWS
Dear Reader, hope you are doing great today. In this blog post you are going to learn about elastic IP and how you can assign an elastic IP to your EC2 Instance.
One of the biggest benefits of compute capacity in cloud such as EC2 is to be able to start, stop, hibernate or terminate your instance within a matter of seconds.
However, there is a downside as well. If you stop your EC2 instance and start it again, the IP address of your instance changes. That means your instance is no longer accessible using your old IP address.
We will learn how we can solve this problem using Elastic IP addresses.
By the end of this tutorial you should be able to know-
- What is Elastic IP?
- What Problem Does it solve?
- How to Assign Elastic IP address to your EC2 Instance in AWS
- How to Release an Elastic IP address from EC2 Instance
So let’s get started.
What is an Elastic IP?
An Elastic IP is a pubic IP address that you can allocate to your AWS account. Once allocated, you can associate this elastic IP to any of your EC2 instance, disassociate from one instance and re-associate to another.
That means it’s a reserved public IP address that you can assign to your EC2 instance. We will learn it’s significance in next section.
Let’s know a bit about public IP address.
What is a public IP?
A Public IP address is an IP address that can be accessed directly from internet. If your EC2 instance has public IP that means your instance is reachable over internet or it can communicate with internet.
Whenever you are trying to access your EC2 instance outside of your VPC, you need to use your instance’s public IP. As private IP’s are only accessible from the VPC.
That means an elastic IP is nothing but a static public IP using which you can always connect/access your instance even if it stops and starts or you fail over to a different instance.
What Problem Does it solve?
When you launch your EC2 instance in a default VPC, your instance receives a public IP at launch. You can use that to connect to your instance.
But the problem is, every time you stop your EC2 instance and start it again, public IP of your instance changes.
Now imagine if you are hosting your application on EC2 and the public IP changes. What is gonna happen?
Well, it’s simple !!!!
Your application becomes inaccessible.
You might think that you will use the new IP address instead. Well that will work of course. But what if you are using a custom domain name where you have specified the IP address of the instance. It is almost impossible and impractical to update the A record manually each time IP address changes.
What’s the solution then?
Well one of the simplest solution is to attach an Elastic IP to your instance. Now even if your system stops , starts or hibernate, your instance has elastic IP attached to it. Even if your instance got terminated somehow, you can launch a new instance and attach the same elastic IP to new instance. By doing this, at route 53 level you wont have to touch and no body will know that behind the scene you failed over from one instance to another.
Now that’s good.
Note: Please know that this is one possible solution however it is recommended to use a load balancer which provides singe entry point to your application using a DNS.
How to Assign Elastic IP address to your EC2 Instance in AWS
Prerequisite: Launch an EC2 Instance in AWS Step by step
- Allocate an Elastic IP
- Assign the allocated IP to your instance
Allocate an Elastic IP
- Login to AWS Management Console and open EC2 service
You can either go to Services -> Compute -> EC2
or type EC2 in the search bar and hit enter. Once you see EC2 option click on that.
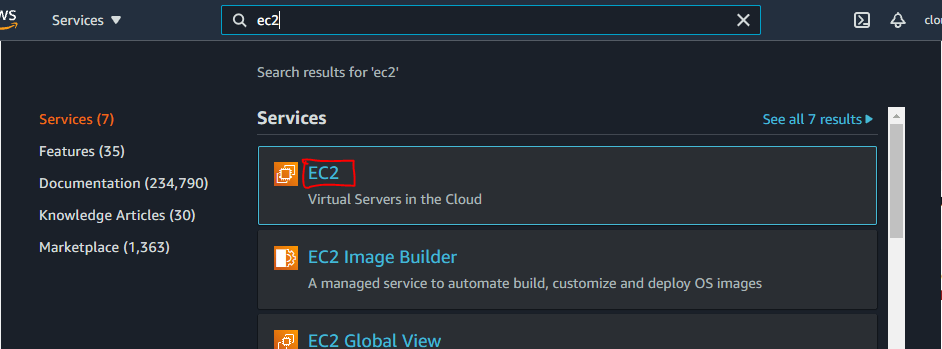
This will lead you to EC2 dashboard.
2. Scroll down the left navigational menu and Click Elastic IPs from Network and Security Section

3. Click on Allocate Elastic IP address as shown in above screenshot
Keep everything default if you want to use an IP from amazons pool and click Allocate

Once you click Allocate, your static public IP or Elastic IP is allocated successfully and you see similar success response like below

Assign the allocated IP to your instance
By this time we have allocated an Elastic IP in our account and we also have an EC2 instance running. So lets associate the Elastic IP to our instance.
Select the newly created Elastic IP, Click Actions and choose Associate Elastic IP address

Select Resource Type as Instance and choose your instance from the instance field(All your running instances will be shown here)

After You have chosen your instance, click Associate
And there you go !!!
The Elastic IP is now associated with your instance and you get to see success message like below

To verify that, stop and start your instance and this time you will notice that Public IP will remain same across stops and starts.
You will also see that Elastic IP is your public IP now. As you can see in the below screenshot, public IP and elastic IP field has got same value 🙂

Release the Elastic IP from your Account
Make sure to release the Elastic IP when you don’t need it so that you don’t get billed for it.
If the Elastic IP is still in use, you need to disassociate the IP from instance in order to release it. However, if you have already terminated your instance and Elastic IP is unused you can release the Elastic IP straightway.
Select your Elastic IP, choose Action and then Release Elastic IP addresses
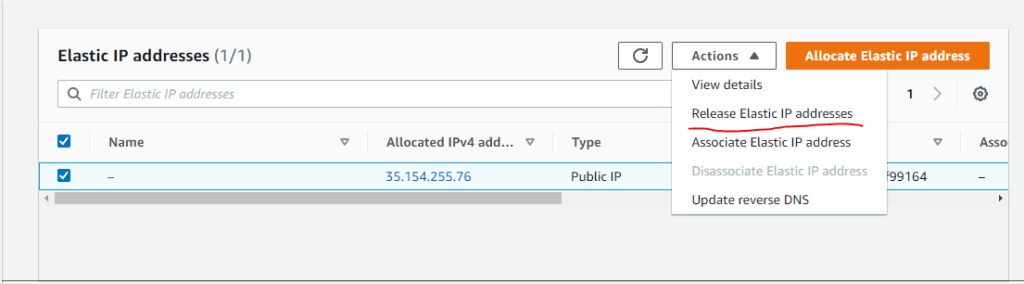
On review popup screen, click Release and your Elastic IP is successfully released.

Conclusion
In this post we learnt –
- What is Elastic IP Address and it’s Significance
- To allocate an Elastic IP Address
- Associate it with an EC2 instance
- How to release an Elastic IP Address
I hope this post was helpful to you. Feel free to let us know in comment in case you face any issue.
Enjoyed the content?
Subscribe to our newsletter below to get awesome AWS learning materials delivered straight to your inbox.
Meanwhile you can also –
Suggested Read:
- Create an EC2 instance in an existing subnet using CloudFormation
- How to Install Apache Web Server on AWS EC2
- Understand IAM PassRole to Secure your AWS Infrastructure
- EC2 Instance Purchasing Options: All You Need to Know
- Use EC2 User Data Script to Bootstrap Your Instance
- Attach an IAM Role to an EC2 Instance using CloudFormation
2 thoughts on “How to Assign Elastic IP address to your EC2 Instance in AWS”