How to Create DynamoDB Table with On-demand Capacity Mode
Amazon DynamoDB is a fully managed, serverless , key-value NoSQL database that provides predictable performance(single digit milli-second) at any scale.
It is a popular database as of today and is being used by hundreds of thousands of customers including Disney and Zoom.
As you might know, by default, a DynamoDB table is created with Provisioned capacity mode. Don’t worry if you don’t understand this at this moment. We’ll discuss this in detail in the later section.
Ideally, In this post, I will show you how to create DynamoDB table with On-demand capacity mode.
Related:
- Create a DynamoDB Table using AWS CLI
- How to Create a DynamoDB table using CloudFormation
- Create a DynamoDB table with GSI using CloudFormation
- DynamoDB Global Table Creation using AWS Console
Prerequisite
- An AWS Account: See How to Setup Your AWS Free Tier Account in Right Way
- Basic DynamoDB Knowledge
- Permission to Create a table
How to Choose Capacity Modes while Creating DynamoDB Table?
Capacity modes are nothing but the way DynamoDB manages read/write capacity for your table and how you are charged for it.
DynamoDB provides two capacity modes-
- On-demand: No capacity planning, pay as you use
- Provisioned: You define a baseline read/write capacity and can add autoscaling to scale as per demand
On-demand vs Provisioned
When you are creating a DynamoDB table, one thing that comes to your mind is whether to go with Provisioned capacity mode or On–demand.
This literally depends on your workload. For instance, if you don’t know the traffic pattern of your application, it doesn’t make sense to provision capacity as you might under-provision or over-provision.
In both cases, you are at loss. Either your business hampers or you pay for unused capacity. Therefore, it’s good to go with On-demand in such cases. However, if your application has consistent traffic, you can go with provisioned mode and save a lot of money as on-demand is expensive.
Don’t want to miss any posts from us? join us on our Facebook group, and follow us on Facebook, Twitter, LinkedIn, and Instagram. You can also subscribe to our newsletter below to not miss any updates from us.
Let’s see how you can create a DynamoDB table with on-demand capacity.
Log in to AWS Management Console and Navigate to DynamoDB
Login to AWS Management Console with your IAM user. Once logged in, search for DynamoDB

Click on DynamoDB as shown in the above screenshot to open DynamoDB.
Create a DynamoDB Table
DynamoDB is a regional service and you create your table in specific regions. Choose a region in which you would like to create your table. For example, I am going ahead with the Mumbai region.
Good to Know: Amazon S3 is a Regional or Global Service?

Related: 4 Main Factors to Consider When Choosing Your AWS Region
After you have chosen your region, you can click on Create table as shown below-

If you don’t see that screen, you can anytime click on Tables from the left navigational menu as shown in below screenshot-

Then click Create table as shown below-

Provide Table Details
Once you are in the table creation screen, enter the Table name and Partition key (primary key).

Scroll down and you will see default table settings –

Please notice in the screenshot that capacity mode is Provisioned and hence a baseline read/write capacity is defined as 5RCU(Read Capacity Unit)/WCU(Write Capacity Unit). Also, you can change the capacity mode of a table later if you need to.
If you want to create your DynamoDB table with Provisioned mode, you can simply go ahead and click next and you should be good to go.
However, you might question, then how to create a table with on-demand mode.
Well, you need to customize the table settings.
Customize table settings

Instead of going with Default settings, click on Customize settings
Leave the table class to standard as of now-

Scroll down to Read/write capacity settings section and choose

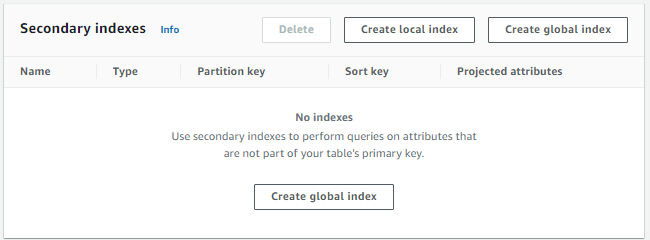
Scroll down and check the secondary indexes section-
If you need to create a GSI, you can create it here. At the moment, I am keeping things simple and not creating any GSI.

Leave the encryption setting as default and then click on create table

As soon as you click Create table, DynamoDB starts creating your table and you get the status as-

Finally the table is created and you see the details.

As you can see from the screenshot above, our table was created with On-demand read and write capacity modes.
Conclusion
In this post, we learnt a bit about DynamoDB capacity modes. DynamoDB has two capacity modes-
- On-demand
- Provisioned
Firstly, we learnt about capacity modes and how to choose between on-demand and provisioned capacity modes. Then we learnt How to Create DynamoDB Table with On-demand capacity mode.
Hope the post was useful to you. Feel free to leave a comment or provide feedback. And, don’t forget to subscribe 🙂
Enjoyed the content?
Subscribe to our newsletter below to get awesome AWS learning materials delivered straight to your inbox.
Feel free to motivate me-
- Add a comment below on what you liked and what can be improved.
- Follow us on, Facebook, Twitter, LinkedIn, Instagram
- Share this post with your friends

