How to Install Boto3 in Visual Studio Code on Windows
Ideally, the title of this post should have been how to install boto3 on windows and configure it to work with visual studio code or VS Code.
But, since users are searching using the keyword “How to Install Boto3 in Visual Studio Code on Windows“, therefore I ended up making this as the title so that you can find this post easily. 🙂
In this post, you will learn-
- How to install boto3(AWS SDK for Python) on windows
- Configure it to work with AWS.
- Write a program using boto3 and test it using VS Code.
Alright?
Let’s get started…
Don’t want to miss any posts from us? join us on our Facebook group, and follow us on Facebook, Twitter, LinkedIn, and Instagram. You can also subscribe to our newsletter below to not miss any updates from us.
First thing first-
What is Boto3 and How to Install Boto3 in Visual Studio Code on Windows?
Boto3 is the AWS SDK for Python. It makes it easier for your Python application or script to work with AWS services such as Amazon S3, DynamoDB, SQS, Amazon EC2 etc.
To install boto3 on your windows system, you need to install its dependency. You need python 3.7 or greater and PIP installed in your system. Once you have the dependency installed, you can go ahead and install boto3.
In this tutorial, I am installing all the dependencies on my windows 10 system. After that, I’ll install boto3 and test it using VS Code. So stay tuned with me till the end.
Pre-requisites
- AWS Account: See How to Create AWS Free Tier Account in Right Way
- Basic knowledge of Python.
- VS Code installed on the system
- AWS CLI
Steps to Install Boto3 in Visual Studio Code on Windows
- Install Python on Your System
- Install PIP on your Windows System
- Install Boto3 on Windows System
- Configure Credentials
- Play with Boto3 in VS Code
Step 1: Install Python on Your System
Before installing, check if python is already present in your system.
Open the command prompt and type the below command.
Python -V
As you can see, it’s not there in my system so I will go ahead and install it.
Navigate to the official Python downloads page and download the stable release of python.
There are many ways in which you can install python on windows. However, for this post, I am going to use the windows installer.
Based on whether your system is 32-bit or 64-bit choose the installer. I am going with the 64-bit installer.
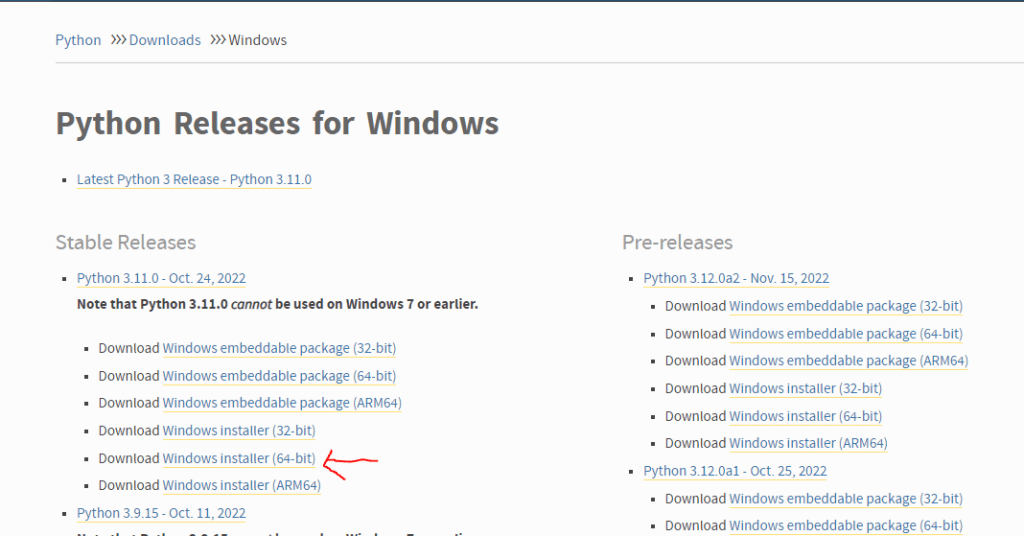
Click on the installer to download it. Once downloaded, just run the installer and don’t forget to check the option to add it to the path as shown in the below screenshot.
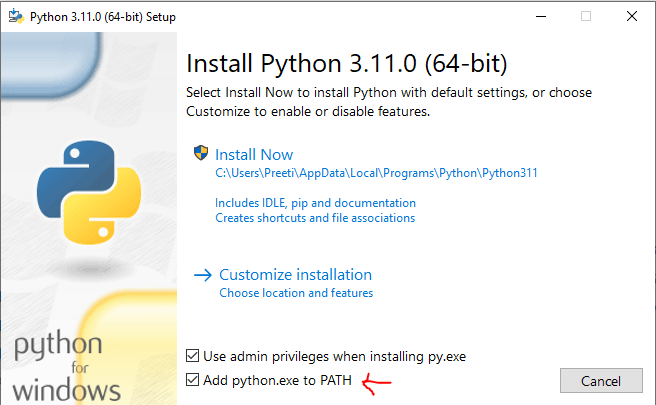
Click Install now.
Adding Python to PATH, windows will always automatically find the Python installation when you execute a Python script or command from the command prompt.
Once the installation is done, close your command prompt window and reopen it. Now when you type Python -V, this is what you see-

You have successfully installed python in your windows system now 🙂
Step 2: Install PIP on your Windows System
PIP is the standard package manager for Python. It lets you install packages or dependencies that do not come bundled with the standard Python library.
If you notice the above Python installer, you’ll see it includes PIP by default. So, ideally, we are all ready to go ahead and install boto3.
Consequently, after installing Python using the installer, if you type pip -V in the command line-
pip -V
Which means it’s already installed with the installer.
However, just for the learning/information purpose here is how you can install PIP on your windows system if it’s already not there.
Download PIP using curl-
curl https://bootstrap.pypa.io/get-pip.py -o get-pip.py
Once downloaded, you can install PIP using the below command-
python get-pip.py
PIP is successfully installed. Let’s move to the next step to install Boto3 or AWS SDK for Python on the windows system.
Step 3: Install Boto 3 on Windows System
You install boto3 using PIP using the below command-
pip install boto3Type the command in the command line and hit enter.

Did you notice the above screenshot?
Congratulations, boto3 is now installed on your windows system.
Additionally, you can type the below command to check the boto3 version.
pip show boto3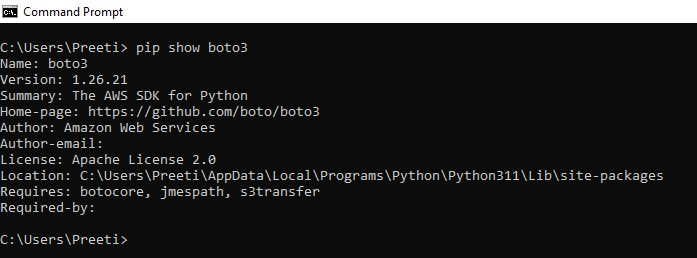
Step 4: Configure your Credentials
Boto3 or AWS SDK for Python is installed in your windows system now. As you would expect, in order to interact with AWS, you must configure your credential.
And the best way is to install and configure your AWS CLI on your windows. I have got it covered for you in this post How to Install and Configure AWS CLI on Windows.
If you already have CLI installed on your system, use the below command to configure your credentials file:
aws configureOnce the CLI is configured, Boto3 with use that credential to authenticate and connect to AWS securely.
Note: Due to security reasons, I don’t really recommend using static credentials. And it’s best if you can configure your AWS CLI using AWS SSO or identity centre by using aws configure sso. You can read more about it here.
Step 5: Play with Boto3 in V S Code
Open VS Code and create a project folder.
In the folder, create a file boto3-demo.py and paste below code into it.
import boto3

s3 = boto3.resource('s3')

# Print out all bucket names
for bucket in s3.buckets.all():
    print(bucket.name)
Save the file and open a terminal in VS Code and type-
python boto3-demo.pyType the command and hit enter.

And, Voila !!! The program has run successfully and displayed all the s3 buckets from my AWS account.
Yaaaayyyyyy 🙂
Conclusion
In this post, we learnt how to install Boto3 in visual studio code on a windows system. We installed Python, PIP and finally Boto3 using PIP. Then we configured our AWS credentials so that Botot3 can work with AWS.
I highly recommend you install Microsoft’s Python extension if you are serious about developing with Python. As it’s gonna make your life easy as a developer.
I hope you found this post helpful. Feel free to drop your questions in the comment section.
Enjoyed the content?
Subscribe to our newsletter below to get awesome AWS learning materials delivered straight to your inbox.
Don’t forget to motivate me by-
- Adding a comment below on what you liked and what can be improved.
- Follow us on
- Share this post with your friends
One thought on “How to Install Boto3 in Visual Studio Code on Windows”